As the current firmware update is not available, please follow the steps below to set up email on your Penstar eNote, especially if you are using Gmail.
1. Download the Required Files
Before setting up email on your Penstar eNote, please download the following two files:
-
Email APK (Hmail-overseas.apk): Download Link
-
hvLauncher.apk: Download Link
2. Transfer and Rename the Files
Once the download is complete, transfer both files to your Penstar eNote.
Make sure to rename “Hmail-overseas.apk” to “Hmail.apk” before installation. This ensures the system automatically detects the update.

3. Install the APK Files
(1) On your Penstar eNote, navigate to Apps > Installed Apps.
(2) Tap the three-dot menu in the top-right corner and select Install APK.

(3) Locate both Hmail and hvLauncher. An “Update” option appears under them, tap Install.
 Once installed, the new Email APK will replace the old version, and you will see a confirmation message: “App Installed”.

4. Configure POP/IMAP on a Computer
To ensure smooth email synchronization, set up POP/IMAP in Gmail on your computer:
(1) Log in to your Gmail account on a web browser.
(2) Click on the gear icon in the top-right corner and select See all settings.

(3) Navigate to the Forwarding and POP/IMAP tab.
(4) Select Enable POP for all mail.
(5) Click Save Changes at the bottom of the page.

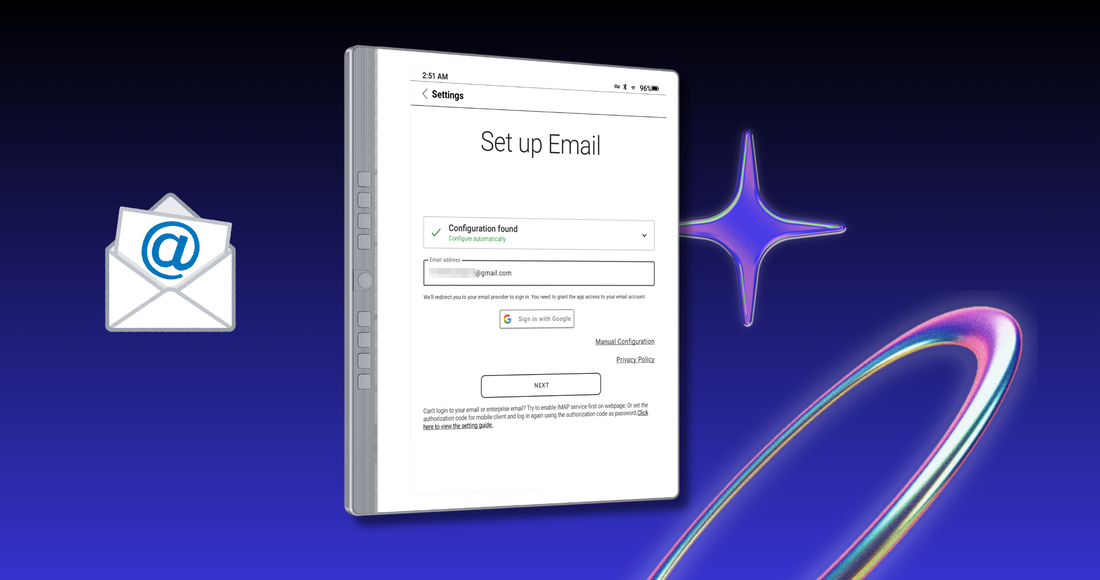
5. Sign in to Gmail on Your Penstar eNote
(1) Open the Email app on your Penstar eNote.
(2) Enter your Gmail address and tap Sign in with Google.
 (3) A verification prompt will appear – select your Gmail account.
(4) Tap Allow to grant access.
6. Complete the Email Setup
(1) The system will automatically check incoming and outgoing server settings.
(2) After verification, enter Your Name (this will appear on outgoing emails.
(3) Once logged in, your Email Home Screen will display your inbox.
Your Penstar eNote is now set up for Gmail! 🚀
If you encounter any issues, please contact our customer service team.
1 comment